by Stefan Holst and Rolf Madsen, Keysight
This blog describes a "side project" - interesting applications of OpenTAP that fall outside of typical test automation. The intent of this blog (and the project it describes) is to provide a unique path to automate your residence using OpenTAP.
It turns out that OpenTAP makes it easy!
Home Automation Applications
At first blush, there are a number of straightforward Home Automation (HA) paths to follow:
Controlling LIFX light bulbs
Scheduling actions with the light bulbs, such as turn off when it gets dark.
Design a system that can always be 'on'. For example a kind of service, mixed with "Resumable" test steps.
Add a WEB UI to control everything.
LIFX Lightbulb Control
Prerequisites
Before getting started, you will need access to / familiarity with
LIFX Light Bulbs - LIFX is a WiFi connected smart light and they provide an easy to use HTTP WEB API with great documentation.
OpenTAP - https://opentap.io
the Servy project - https://github.com/rolfrm/servy
Authentication and Setup
We will need to obtain an authentication token and use it when calling the API.
With C# it's easy to set up a HttpClient with that token attached.
private static HttpClient client;
static void Init()
{
    client = new HttpClient();
    client.DefaultRequestHeaders.Authorization = new AuthenticationHeaderValue("Bearer", LifxSettings.Current.TOKEN);
    needInit = false;
}
This HttpClient can now be used to send request to the LIFX HTTP WEB API. We will use this client and API to create methods to control our lights.
Discovering Available Lights
Before we can control LIFX lights, we need to find them. LIFX has a simple endpoint to list all lights:
public static List<LifxLight> GetLights()
{
    if (needInit)
        Init();

    var data = client.GetStringAsync("https://api.lifx.com/v1/lights/all").Result;
    return JsonConvert.DeserializeObject<List<LifxLight>>(data);
}
Sending Commands to the Lights
With the list of lights in hand, we can create methods to control them.
To turn on a light, we need to provide the ID of the light the state of which needs to change /id:<the light id>/.
We also need to set which properties of the light need to change. In our case we want to change power to off. We can accomplish this task with the form URL encoded data (x-www-form-urlencoded).
public static void TurnOn(LifxLight light)
{
    var form = new List<KeyValuePair<string, string>>();
    form.Add(new KeyValuePair<string, string>("power", "on"));
    var content = new FormUrlEncodedContent(form);
    client.PutAsync($"https://api.lifx.com/v1/lights/id:{light.id}/state", content).Wait(1000);
}
OpenTAP LIFX Settings
Once we have a working API to control LIFX light bulbs, we need a way to map the API to OpenTAP.
We can create a ComponentSetting that can store the details of the lights.
public class LifxSettings : ComponentSettings<LifxSettings>
{
public List<LifxLight> Lights { get; set; } = new List<LifxLight>();
[Display("Search for Devices")]
[Browsable(true)]
public void ScanForDevices()
...
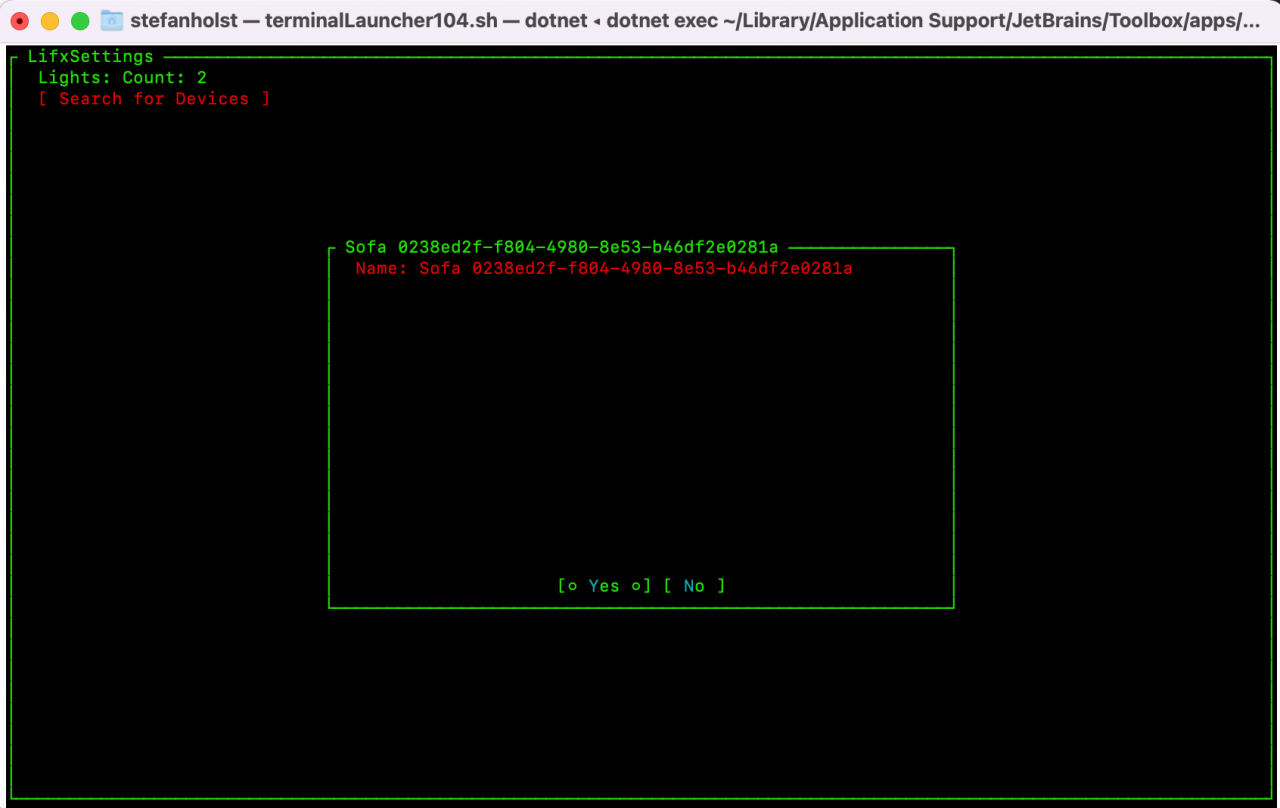
}We can also create a method callable from a GUI that can search for lights using our LIFX API and add them to this list.
Below we add a light, we need to check if it already exists and then give the user the option to add it:
[Display("Search for Devices")]
[Browsable(true)]
public void ScanForDevices()
{
    var lights = LifxApi.GetLights();

    foreach (var light in lights)
    {
        if (Lights.Any(d => d.uuid == light.uuid) == false)
        {
            var newDeviceRequest = new NewDeviceRequest()
            {
                Name = $"{light.label} {light.uuid}"
            };
            UserInput.Request(newDeviceRequest);

            if (newDeviceRequest.response == NewDeviceRequest.Response.Yes)
                Lights.Add(light);
        }
    }
}
Below is how it looks in the TUI:
OpenTAP LIFX TestStep
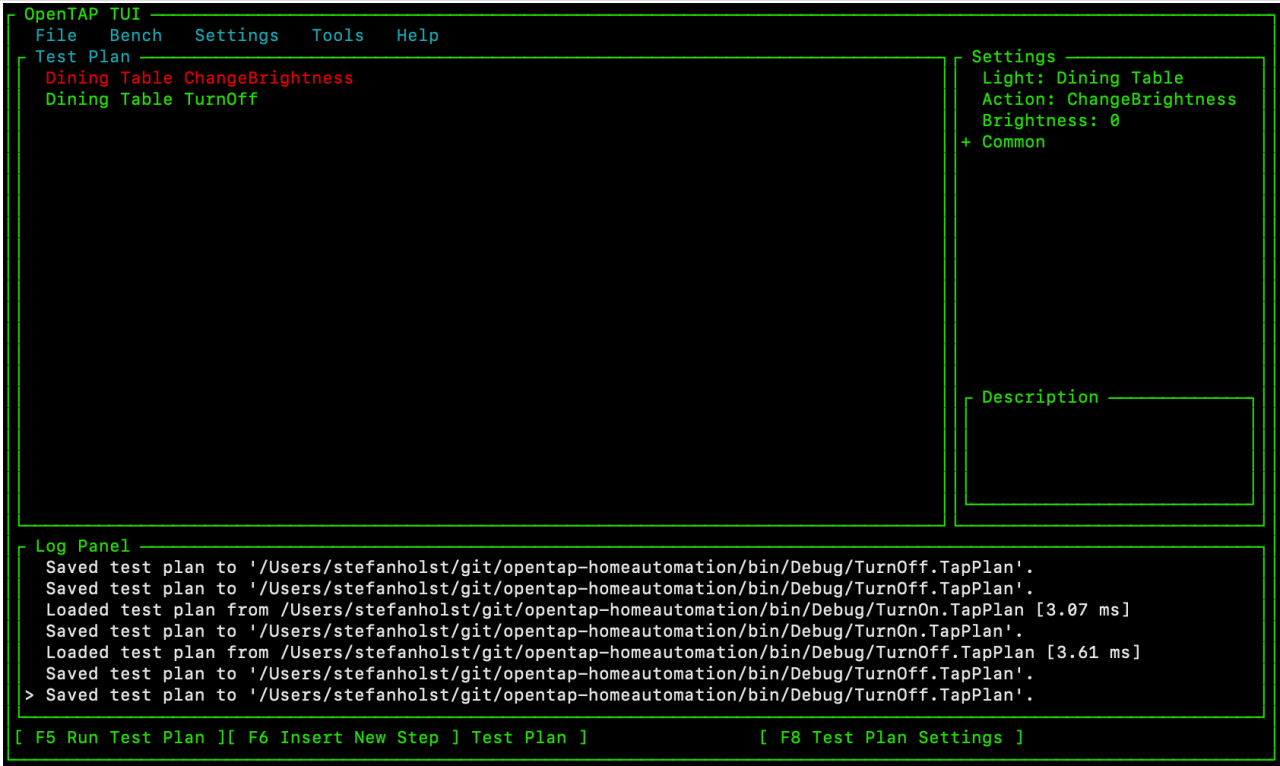
For OpenTAP to control the lights, we need to create a test step.
The step needs to select which light to change and how it should change, most easily accomplished with a property and the AvailableValues attribute; this way the GUI will show a list available lights to control.
public class LifxStep : TestStep
{
public List<LifxLight> AvailableLights => LifxSettings.Current.Lights;
[AvailableValues(nameof(AvailableLights))]
public LifxLight Light { get; set; }
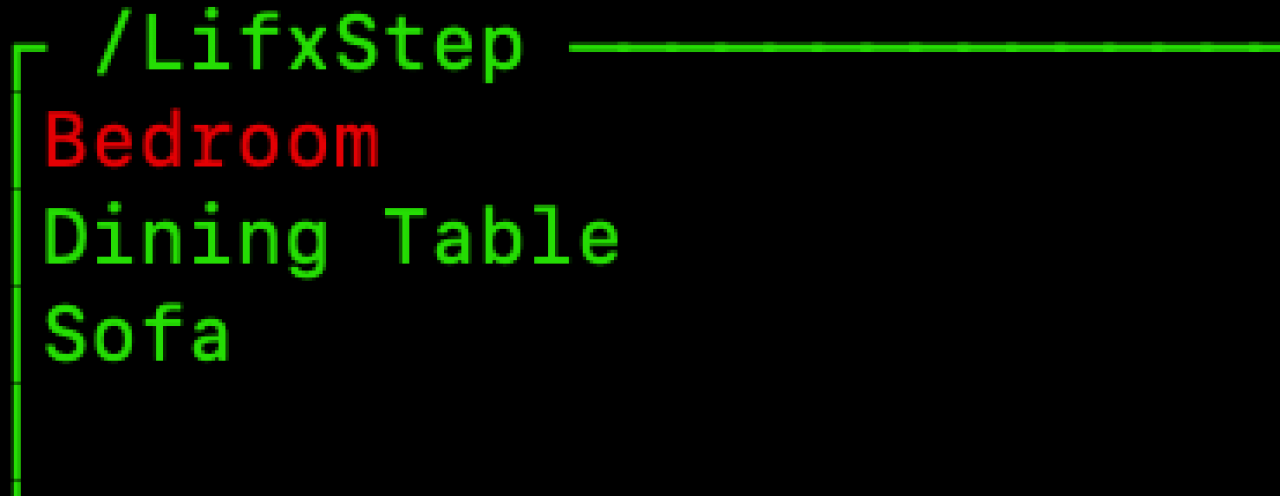
}The available values will appear as
Next, select which change to send to the lights. We can create a enum with the possible actions to run. This enum will function similarly to the AvailableValues attribute by automatically providing the available options:
public enum LifxAction
{
    TurnOn,
    TurnOff,
    ChangeBrightness,
    SetColor,
    SetTemperature
}
public LifxAction Action { get; set; }
With these options we only need to make the right API call in the TestStep Run method:
public override void Run()
{
    if (Light == null)
        UpgradeVerdict(Verdict.Inconclusive);

    try
    {
        switch (Action)
        {
            case LifxAction.TurnOn:
                LifxApi.TurnOn(Light);
                break;
            ...
        }

        UpgradeVerdict(Verdict.Pass);
    }
    catch
    {
        UpgradeVerdict(Verdict.Fail);
    }
}
Scheduling Test Steps
In home automation, it is most useful to be able to run automations triggered by certain events. For example, if you want to start an alarm and turn on the lights in the morning.
To fulfill this need we created a number of different test steps:
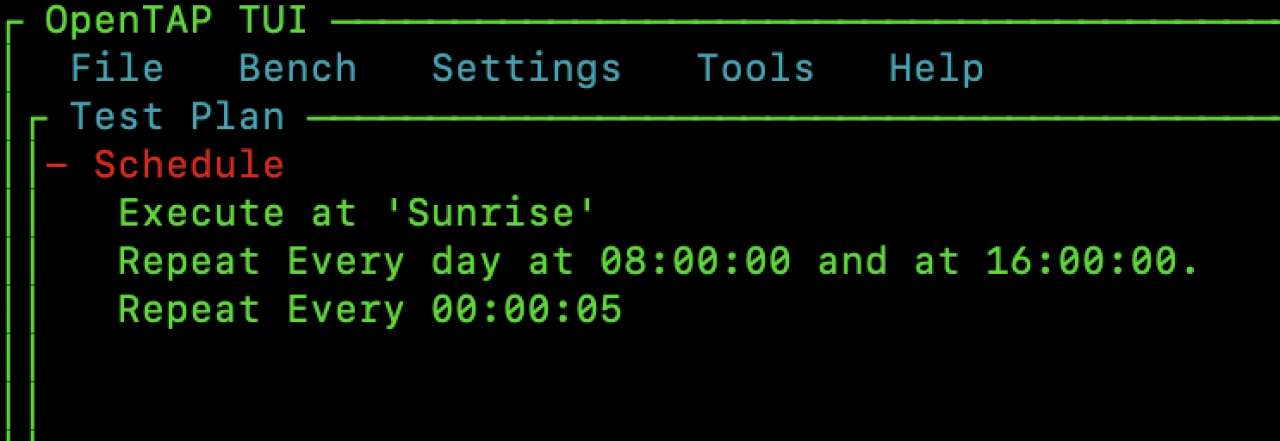
Schedule Step
Use a parent test step for all scheduling-based steps. It is capable of running the child steps when a specified even occurs, e.g., time of day. It runs the child steps in separate threads so that multiple steps can be scheduled concurrently.
The design of the Schedule Step relies on the AllowChildrenOfType attribute, so that we can ensure that all child steps implements a specific test step:
[AllowChildrenOfType(typeof(ITimeTriggeredStep))] // only allow ITimeTriggeredStep as childsteps.
public class ScheduleStep : TestStep{
   ///...
}
The IScheduledStep is relative simple. All it does is inform ScheduleStep when the next time it should run.
/// <summary>
/// This kind of triggered event can calculate the time until it should be triggered to start the next time.
/// </summary>
public interface ITimeTriggeredStep : ITestStep
{
    /// <summary> How much time until triggering the event. </summary>
    TimeSpan TimeToTrigger { get; }
}
The ScheduleStep method does the following to determine which step to run next and then run it:
var nextUp = ChildTestSteps
          // fetch all the test steps if this type.
         .OfType<ITimeTriggeredStep>()
          // order by the first to trigger next.
         .OrderBy(x => x.TimeToTrigger)
         // take the first one.
         .FirstOrDefault();
// wait until it is ready to execute.
TapThread.Sleep(nextUp.TimeToTrigger);
// execute it asynchronously
TapThread.Start(() => this.RunChildStep(nextUp));
We developed a few different test steps that implements the ITimeTriggeredStep.
Time of Day Step
This test step will execute its child test steps at a specific time of day. Multiple times can also be selected on a given day.
Interval Step
The interval step runs the child test steps every given time interval. For example, all child steps can be executed every 5 seconds.
Sun-based Step
This test step runs all child steps when the sun goes up or goes down. This can be useful if you want all lights to turn off when the sun rises.
Future Scheduled Steps
In the future we may add test steps that are triggered by other events, such as temperature changes, button clicks, web hooks. etc. These should also be included for support in the Schedule Step.
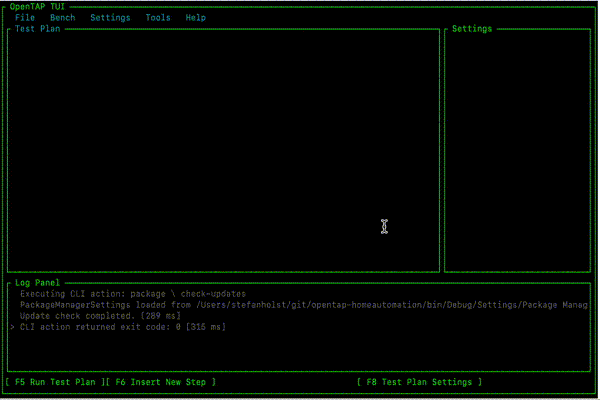
Create an OpenTAP TestPlan
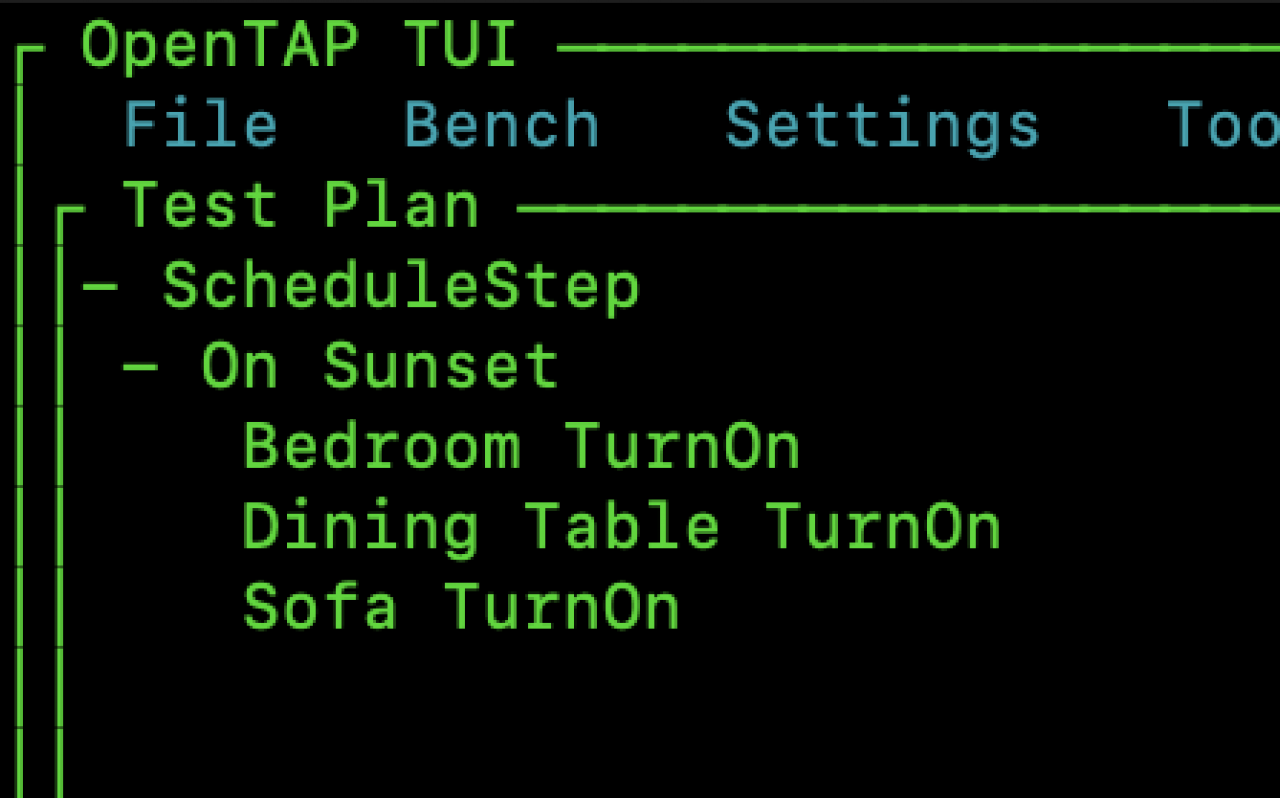
With the TestStep ready we can start creating an OpenTAP TestPlan, allowing us to do all kinds of cool stuff with the lights.
Here are a few useful and fun ideas:
Turn on the lights when the sun sets
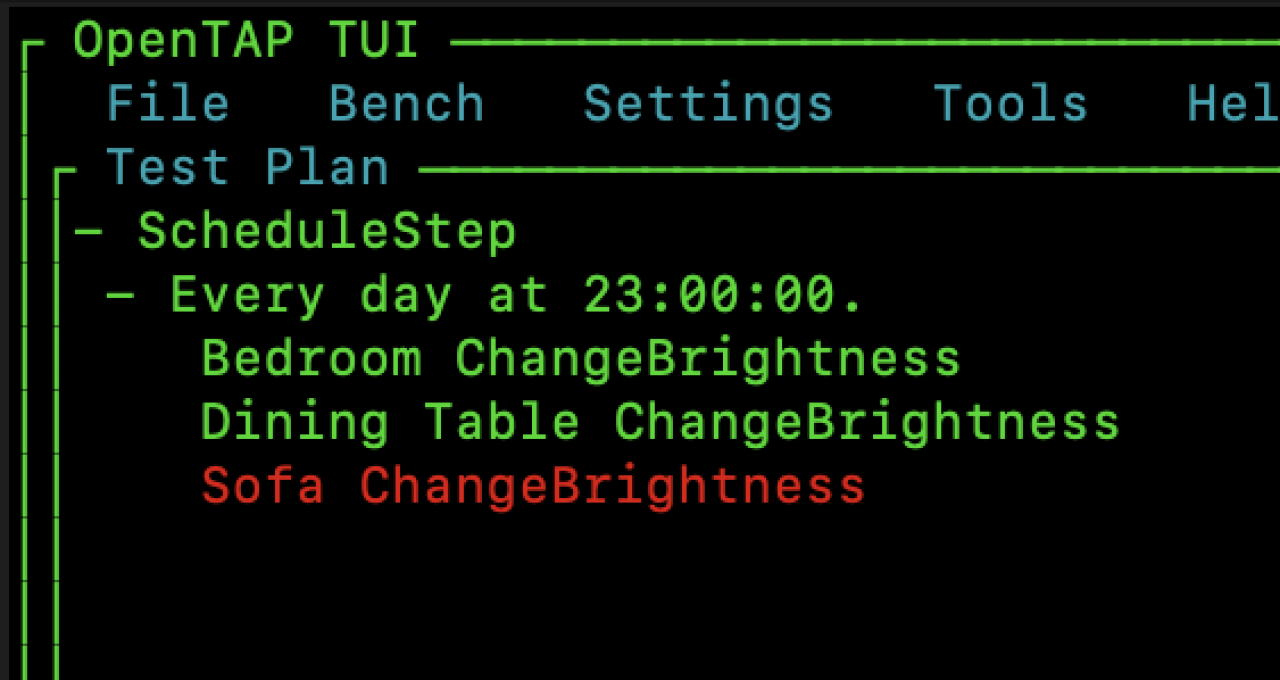
Lower the brightness of the lights in the evening, before bedtime
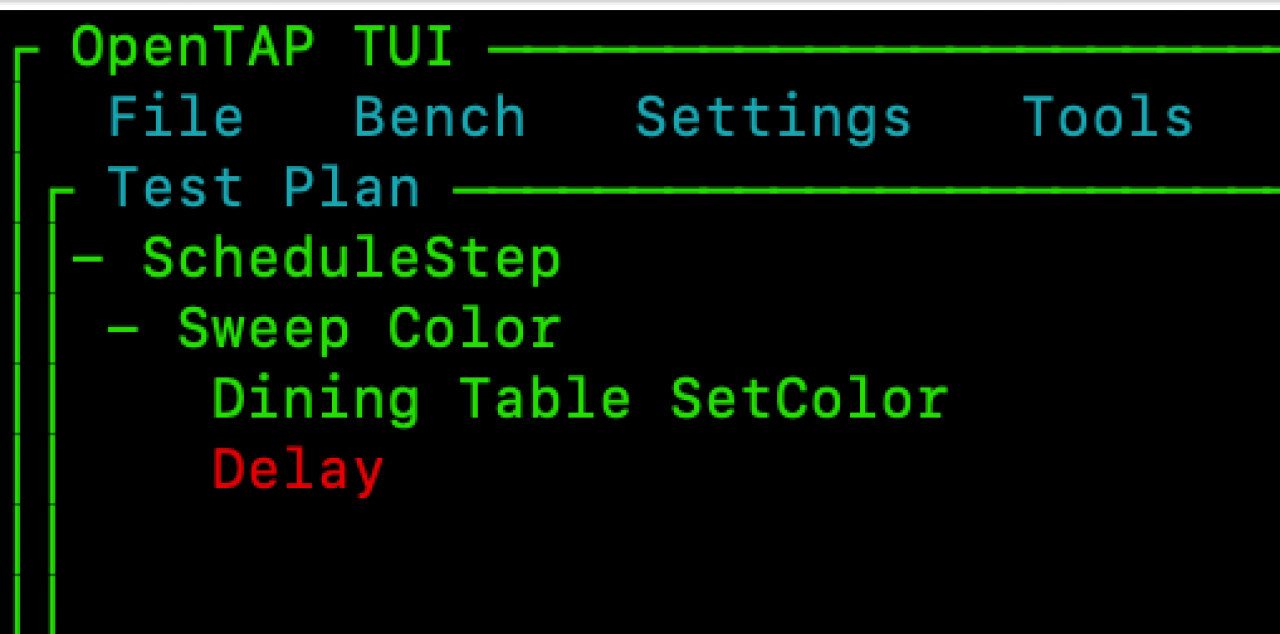
Create a fun party mode with the light continuously changing colors
Turn on the lights when the sun sets:
Lower the brightness in the evening, before bedtime:
Sweep different colors going through all imaginable colors of the lights:
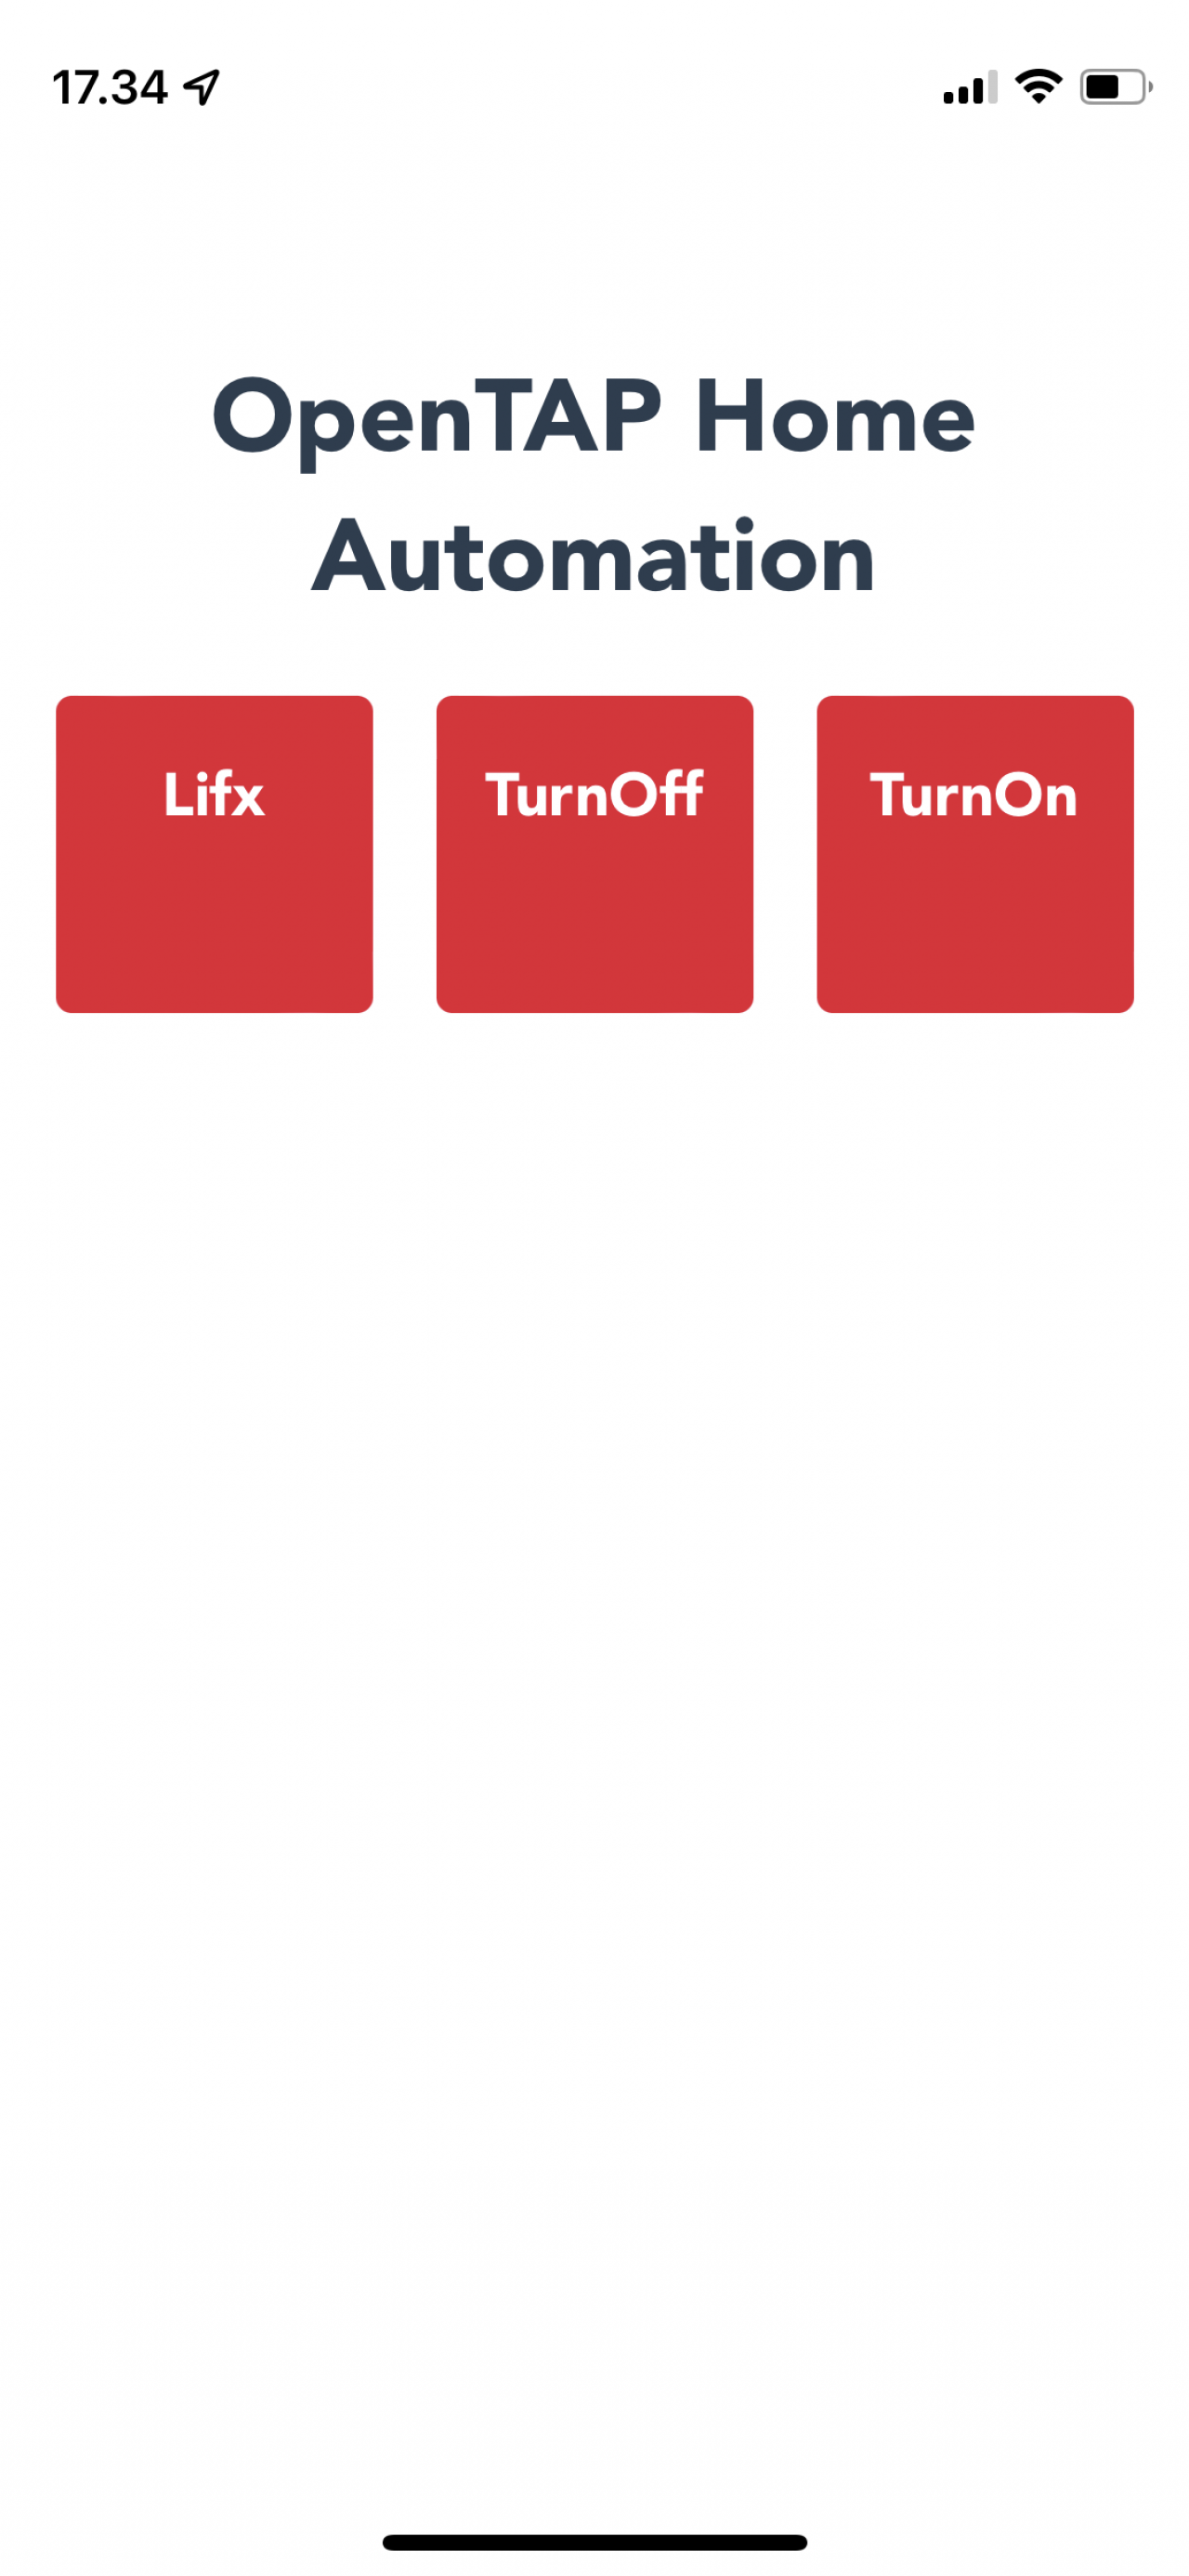
Create a small WEB GUI
We can create a small web gui using an open-source web server called Servy.
Servy
Servy is a small web server that maps http endpoints to cli calls.
We can configure Servy to map two endpoints, one to get all test plans in the current directory and one to execute a test plan.
#!servy
endpoints:
  getplans:
    call: dash -c "ls *TapPlan"
  runplan:
    call: dash -c "/usr/local/share/dotnet/dotnet tap.dll run $plan.TapPlan"
host: http://192.168.163.178:8080
With these two endpoints we can create a test plan that turns on a specific light or turns it off. We can also create a plan that performs multiple tasks, such as turning on multiple lights in one go.
A Vue.js GUI
We can use vue.js to create a PWA (Persisted Web App), a web app that acts like a native smartphone app. This web app can then call these endpoints and present them in a user-friendly way.
HTML Template:
We create a small loop that shows all plans from a list of test plans.
<template>
  <div class="grid">
    <div class="light" v-for="plan in testPlans" :key="plan" @click="runPlan(plan)">
      <h3></h3>
    </div>
  </div>
</template>
Implementation Code
In vue we have a method called mounted that runs whenever the view is mounted. We can use this to call the /getplans endpoint, which list all available TestPlans.
We also create a method to run a specific TestPlan whenever the user clicks one of the TestPlans.
<script lang="ts">
...
  public testPlans: string[] = [];

  async mounted(){
    // Get available test plans
    this.testPlans = await (await axios.get("/getplans")).data.split("\n").filter((p:string) => !!p).map((p:string) => p.substr(0, p.length - 8));
  }

  public async runPlan(plan: string){
    await axios.get("/runplan?plan=" + plan)
  }
}
</script>
Final WEB UI Result
Aside from this code we have some styling (not shown). The end result appears something like this: